该教程是演示6代自动调适配
The tutorial is demonstrating auto-adaptation of 6-generation HDDs
12代的自动调适配就不在这演示了。不过要注意的是12代的盘,如果固件是CC34的话,一定要刷到CC49的固件,因为CC34的固件对“W”指令支持不好,会导致盘不就绪或者其他问题。
12-generation HDDs automatic adaptation is not in this demonstration. However, note that for 12-generation HDDs, if the firmware is CC34, then we must brush to the CC49 firmware because the CC34 firmware does not support well for the “W” command. It will lead to disks’ not being ready or other problems.
段位测试只针对12代的盘有效。11代及以下都没有用,只会测试一条ZONE的吞吐量。
The zone test is only valid for 12-generation HDDs. For 11-generation and below HDDs, this function can not be used. It will only test a ZONE throughput capacity.
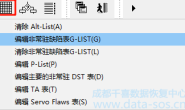
1、点击自动调适配会先做一系列初始化操作。
1. Click on the automatic adapatation, and a series of initialization operations will be done.
2、接下来就是默默等待了。
2. Wait for a while.
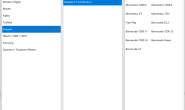
3、等自动调适配完成后,可以先看一下调整的情况,如果调整后的情况还有一两条不正常,可以手动的修改相对应的适配参数,然后点“写入ROM”,再将ROM用Bootcode模式写入到硬盘中。直到满意为止。
3. After automatic adaptation is completed, you can look at the adjustment of the situation. If one or two items are still not normal after the adjustment of the situation , you can manually modify the corresponding adaptation parameters, and then click “write to ROM” and write ROM to the HDD in Bootcode mode until satisfied.
注:自动调适配不是万能的,不能把物理坏道给调好。这个盘的Head:0 Zone:0有物理坏道就不管了。
Note: automatic adaptation is not almighty. It can not fix the bad physical tracks.If there are bad physical tracks in Head 0 and Zone 0 of this HDD, you can leave them alone.
操作演示视频
转载请注明:成都千喜数据恢复中心 » 使用MRT为希捷硬盘自动调整适配