某些SAS驱动器的固件有一定的局限性:它们可以工作一段时间(在固件内部写有“开机时间”值),但是当时间结束时,无论其状态如何,驱动器都会停止工作。此外,某些NAS系统可能需要特殊的扇区大小:每个扇区512/520/528字节。从版本6.7.12开始,可以使用PC-3000 SAS成功解决这些问题。(如果支持驱动器)。因此,让我们同千喜成都数据恢复中心一起看看如何处理。
Some SAS drives have a limitation in their FW: they work for some time (Power-on Hours value written inside of FW), but when the time is over, the drive stops working no matter its condition. Also, some NAS systems can require a special sector size: 512/520/528 bytes per sector. These issues can be successfully solved with the PC-3000 SAS, beginning with ver. 6.7.12, if a drive is supported. So, let’s see how to deal with that.
我们知道如何使用PC-3000 SAS的”Download microcode” 功能来更改硬盘固件,型号和供应商以便恢复NAS存储服务器数据并使其正常工作。但是在将FW加载到目标系统以安装HDD之后,您可能需要更改扇区的大小。有些服务器的标准扇区大小为512字节/扇区,服务器和存储系统使用的扇区大小为520或528字节/扇区。
We know how to change FW, model, and vendor using the “Download microcode” feature. But after loading FW in the target system to install the HDD, you may need to change the size of a sector. There are servers with a standard sector size of 512 bytes/sector, and servers and storage systems that use a sector size of 520 or 528 bytes/sector.
您可以在录制固件之前或之后更改扇区的大小。固件录制后做得更好。
You can change the size of the sector before recording FW or after that. Better done after FW recording.
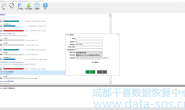
要更改扇区的大小,必须首先实际更改扇区的大小,然后执行格式化。转到工具->硬盘->设置最大LBA:
To change the size of a sector, you must first actually change the size of the sector, and then perform formatting. Go to Tools->HDD->Set Max LBA:
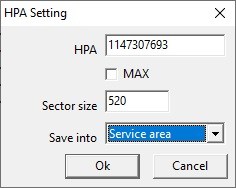
在“扇区大小”字段中,将大小更改为值,通常为512、520、528。在“保存到”字段中,选择“服务”区域(默认值为RAM。单击“确定”。
In the Sector size field, change the size to the value, usually 512, 520, 528. In the Save into field, select Service area (the default is RAM. Click Ok.
注意!执行此步骤之后,如果选择了“保存到服务”区域而不是“ RAM”中,则在格式化完成之前将无法访问数据。
Attention! After this procedure, if Save into Service area is selected, and not in RAM, access to data will become impossible until formatting is completed.
更改扇区大小后,必须格式化整个磁盘。
After changing the sector size, you must format the entire disk.
注意!格式化之后,所有用户数据将被删除。
Attention! After the formatting procedure, all user data will be erased.
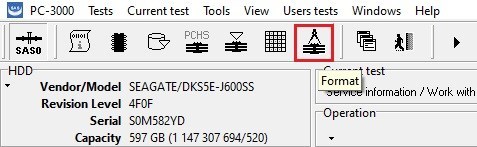
选择测试->格式或按工具栏上的按钮:
Select Tests ->Format or press the button on the toolbar:
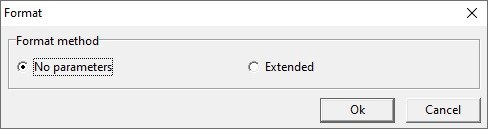
您可以保留No参数,但是完成百分比将不可见,并且在该过程的哪个阶段也不清楚。
You can leave No parameters, but then the percentage of completion will not be visible and it will not be clear at what stage the process is at.
选择扩展:
Select Extended:
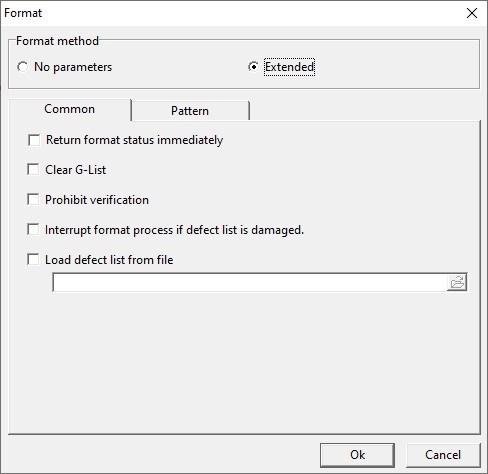
现场分配:
Field Assignment:
- 立即返回格式状态:设置此复选框可使系统控制格式设置过程。如果未设置此复选框,则格式化将作为一个非常长的命令执行。在这种情况下,仅在格式化命令结束后,执行其他命令的尝试才会结束。设置此复选框将导致以下事实:在执行格式化命令的过程中,系统将向HDD请求有关其执行的信息。“格式化”命令的完成百分比显示在过程状态显示区域中。
- Return format status immediately: Setting this checkbox allows the system to control the formatting process. In the case when this checkbox is not set, formatting is performed as one very long command. In such a case, an attempt to execute any other command will end only after the formatting command ends. Setting this checkbox leads to the fact that in the process of executing a formatting command, the system will request information about its execution from the HDD. The percentage of completion of the “Formatting” command is displayed in the process status display area.
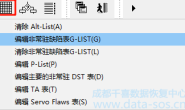
- 清除GList:设置此复选框将清除GList。
- Clear G-List: Setting this checkbox clears the GList.
- 禁止验证:选中此复选框可以加快格式化过程,因为不执行格式化后内部HDD固件对磁盘表面的验证。
- Prohibit verification: Setting this checkbox allows you to speed up the formatting process because the verification of the disk surface by the internal HDD firmware after formatting is not performed.
- 缺陷列表损坏时的中断格式处理:某些HDD型号需要设置此复选框。如果格式化过程立即失败,请参阅HDD上的文档。
- Interrupt format process if defect list is damaged: Some HDD models require this checkbox to be set. See the documentation on the HDD if the formatting process immediately fails.
- 从文件加载缺陷列表:您可以从缺陷文件加载已保存的缺陷表。在格式化期间,这些缺陷将被写入GList。
- Load defect list from file: you can load the saved defect table from the defect file. During formatting, these defects will be written to GList.
您需要立即设置“返回格式”复选框以显示完成百分比。并且,如果不需要验证,则标记为“禁止验证”。
You need to set the checkbox Return format status immediately to display the percentage of completion. And, if verification is not necessary, the flag is Prohibit verification.
单击确定。命令开始执行。根据磁盘容量的不同,格式化时间可能会非常长,从30分钟到几小时不等。格式化过程不能中断。如果由于某种原因格式化被中断,则需要重新启动。
Click Ok. Command execution will begin. The formatting time can be quite big, depending on the disk capacity, from 30 minutes to several hours. The formatting process cannot be interrupted. If for some reason the formatting is interrupted, then you need to start it again.
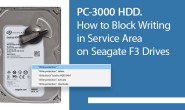
某些SAS驱动器只能在有限的时间内工作,该值称为开机时间(POH)并用HDD FW编写。
Some SAS drives can work only a limited amount of time, this value is named Power On Hours (POH) and written in HDD FW.
要编辑POH,我们需要转到测试->服务信息->使用服务区域-> HDD ID编辑器:
To edit POH we need to go to Tests->Service information->Work with service area->HDD ID editor:
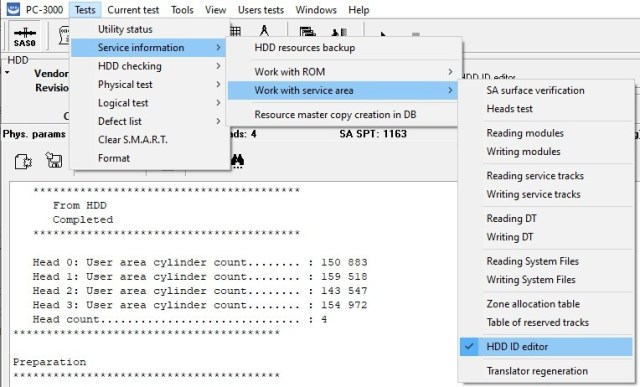

目前暂时无法更改序列号,但是我们可以手动输入任何“开机时间”和“开始/停止”周期值,然后按“确定”。具有ROM写入功能的更改序列号的功能将在最近的时间添加到PC-3000 SAS中。
The serial number is not available to change for the moment, but we can manually enter any Power On Hours and Start/Stop cycles values, and press Ok. The feature of changing the serial number is going to be added to the PC-3000 SAS in the nearest time with the ROM writing ability.
要应用更改,必须重新启动驱动器。更改被保存到服务区。转到HDD ID编辑器,然后检查POH和“开始/停止”值是否是新的。
To apply the changes the drive must be restarted. Changes are being saved to the Service Area. Go to HDD ID editor and check if POH and Start/Stop values are new.
现在,该驱动器可以再次用作新驱动器。请不要忘记进行任何备份!
Now the drive can be used again as a new one. Please do not forget to make a backup before any action!