Let’s imagine the following situation:
让我们想象一下下面的情况
After you have finished recovering data, you get only a sequence of binary files which contains recovered raw data that were deleted or corrupted (e.g. task.prm, map.bin, and other files related to the task settings). Or, say, you have used some other tool for data imaging and got some sequence of binary data files as well.
完成数据恢复之后,您只会获得一系列二进制文件,其中包含已删除或损坏的恢复的原始数据(例如task.prm,map.bin以及与任务设置相关的其他文件)。 或者说,您使用了其他一些工具进行数据镜像,并且还获得了一些二进制数据文件序列。
What to do with this? Let’s find it out in our new article
这个怎么办?让我们在我们的新文章中找出答案

The PC-3000 Data Extractor software allows you to work with different source devices:
PC-3000 Data Extractor软件允许您使用不同的源设备:
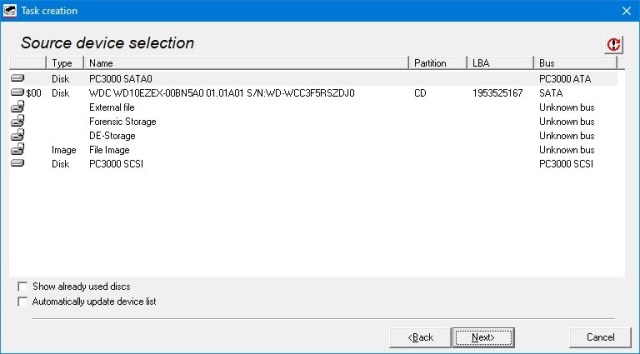
…for the current task we are interested in the following points:
…对于当前任务,我们对以下几点感兴趣:
– External file
– File Image
If we choose “External file“, then we need to select any single file for research in the Data Extractor software tool.
如果选择“外部文件”,则需要在Data Extractor软件工具中选择任何单个文件进行分析。
But it’s only a single file, and our case is a sequence of files.
但这只是一个文件,我们的案例是一系列文件。
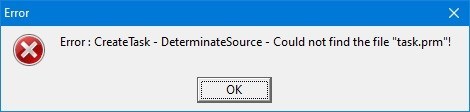
If we choose “File image“, then we can select the folder with the previously created DE task, but it should contain task.prm and other files created for the previous task.
如果选择“文件映像”,则可以选择包含先前创建的DE任务的文件夹,但该文件夹应包含task.prm和为先前任务创建的其他文件。
Otherwise, the DE software shows an error and doesn’t allow creating a new task.
否则,DE软件会显示错误,并且不允许创建新任务
So, what to do?
那么该怎么办?
It’s necessary to merge all binary files into one big binary file. And the default Windows command will come to help us.
有必要将所有二进制文件合并为一个大的二进制文件。 默认的Windows命令将为我们提供帮助
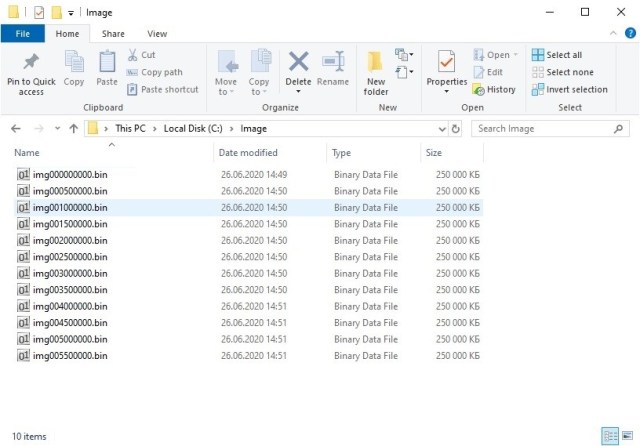
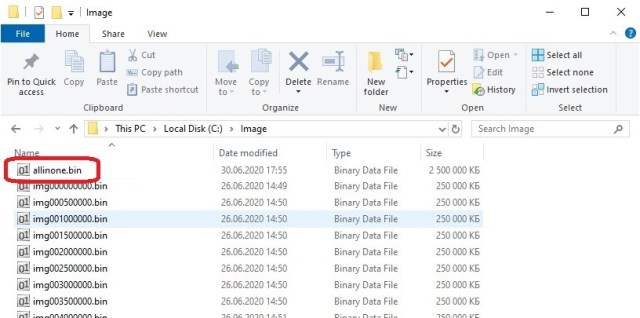
First of all, you need to put all necessary bin files into one folder (it’s better to use the folder created in the Root folder of the Local drive).
For example C:\Image (or any other local drive)
首先,您需要将所有必要的bin文件放入一个文件夹中(最好使用在本地驱动器的Root文件夹中创建的文件夹)。
例如C:\ Image(或任何其他本地驱动器)
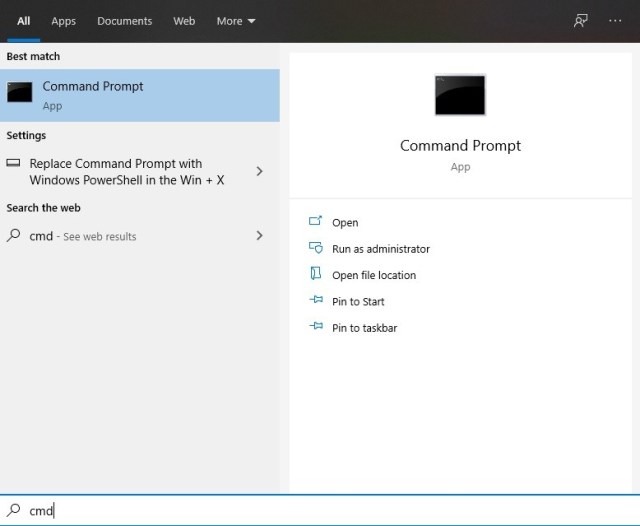
Then open Command Prompt application with ‘cmd’
然后使用“cmd”打开“命令提示符”应用程序
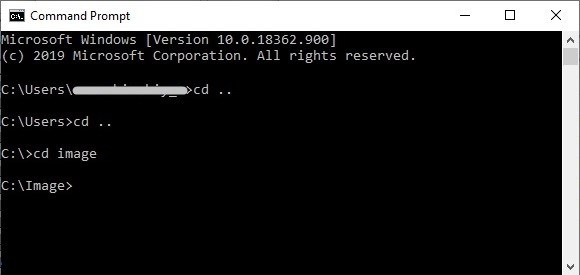
After that go to your folder (where the bin-files placed)
之后,转到您的文件夹(bin文件所在的位置)
‘cd’ command allows users to navigate.
‘cd..’ – go to the parent folder
‘cd *name*’ – go to the folder with the typed name.
In our case, we need the C:\Image folder
在我们的例子中,我们需要C:\ Image文件夹
The new file will be stored in the same folder:
新文件将存储在同一文件夹中:
Now you can create a new Data Extractor task, choose the “External file” option as a source device, select our new ‘allinone.bin’ file, and investigate it.
现在您可以创建一个新的Data Extractor任务,选择“外部文件”选项作为源设备,选择我们的新的“allinone.bin”文件并进行分析。
Or you can open this file in any other Data Recovery tool for research.
或者,您可以在任何其他数据恢复工具中打开此文件进行分析。
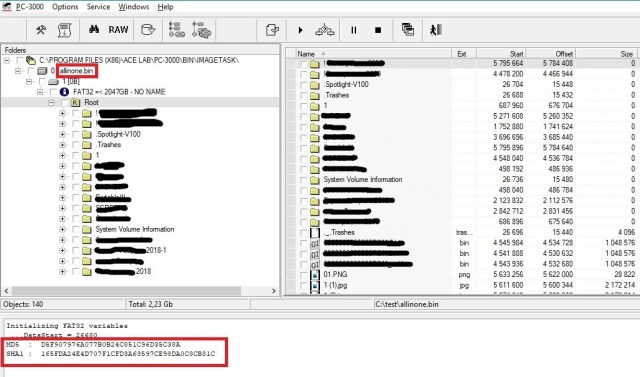
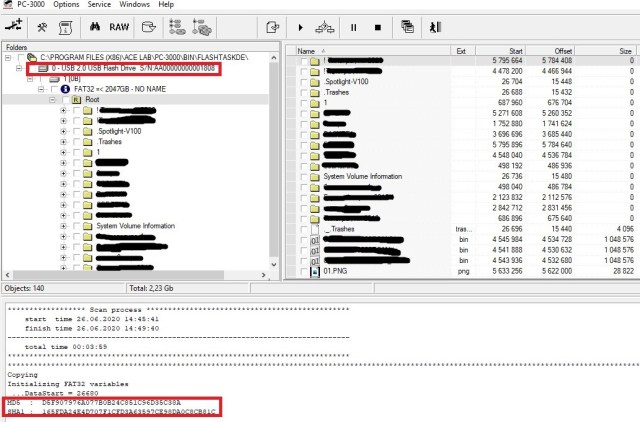
Take a look at the Hash-sum. You can be sure that the merged file is absolutely the same as your source files. Everything is the same including the Hash-sum.
看一看哈希值。 您可以确定合并后的文件与源文件完全相同。 包括哈希和在内的所有内容都相同。
Please note:
If your image is not full (e.g. you just expanded the partition and made a copy of some files without imaging of the whole user area), then the bin-files partition can be corrupted after the merging, the Hash-sum will also be different, but all the imaged files still be available in the RAW scan.
如果映像不完整(例如,您只是扩展了分区并制作了一些文件的副本而没有整个用户区域的映像),则合并后bin文件分区可能会损坏,哈希和也将有所不同 ,但是所有图像文件在RAW扫描中仍然可用。
P.S. Be sure that your Local drive has enough free space for storing this new big file.
P.S.确保您的本地驱动器有足够的可用空间来存储此新的大文件。
Bonus: This cmd command also helps to merge sequence of txt-files ::__IHACKLOG_REMOTE_IMAGE_AUTODOWN_BLOCK__::10
此cmd命令还有可以合并多个txt文件
转载请注明:成都千喜数据恢复中心 » 如何使用PC-3000 Data Extractor将多个BIN文件合并成一个镜像文件